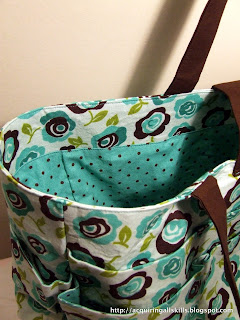
I actually did quite well, all things considered. The thing that derailed me was really silly - the velcro closure. I was afraid to sew velcro on, couldn't find the right type, ended up getting some and then let the project lay untouched for almost two years. I came across it this weekend while looking for something to sew and finished it within a few hours.
It makes me laugh looking back at the bag now. The tension on my machine was so terrible! At the time, I barely knew was tension was, just that sometimes my machine seemed to work better than others. A few of the pockets are barely on there (such loose tension!) and will probably need to be hand-reinforced at some point. I actually should have done that before sewing in the lining, whoops.
 |
| polkadots! and puckering... |
The bag makes copious use of interfacing, too. My current interfacing skills are clearly still at the same level they were when I started. Luckily, it's a little harder to notice the puckering and bubbling because the print is patterned and there are so many layers of pockets on top. I did some research on interfacing and now have some tips for the next time I have to use it:
- Don't move your iron when you are fusing. Even though it is more fun. There is a big difference between "pressing" and "ironing" and I need to remember that.
- A damp pressing cloth helps a lot.
- Don't be impatient! You really do have to leave the iron on the fabric and --press hard-- while "pressing" for the amount of time it tells you to. It does take forever and you can't rush it.
- Match your interfacing weight to the weight of the fabric.
- If all else fails, and you don't mind something a little less stiff/bonded and having to sew through multiple layers, sew-able interfacing works too.
Anyway.
The velcro looks pretty terrible too. I totally should have used the massive velcro I got for my laptop sleeve. The velcro I bought years ago was iron-on. At the time, I thought it would be easier, but the instructions call for actually ironing - not pressing - the velcro on. And since the whole bag is covered in fusible interfacing, that's a recipe for disaster. And, for some reason, I got this weird velcro that was already broken into half inch squares - I hope not by choice, I'm going with the benefit of the doubt and saying that I had no idea it was like that. But, I just went with it. It looks terrible. Thanks Past Ally. Future Ally has learned her lesson.
Overall though, the bag looks good, and I'm happy to have finally finished that project. My other long outstanding sewing project, my quilt, is in the home stretch too, but quilting is another intimidating challenge. To be continued...

No comments:
Post a Comment